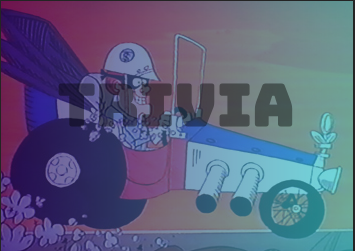
Cartoon characters can be much more difficult than photos to disguise because lines and color changes are much more pronounced. What worked in the last demonstration didn't work on this image of Tom Slick as shown below. So in this demonstration we'll show a different approach.
Disguising Illustrations
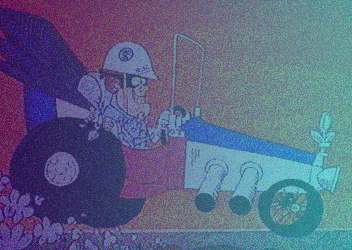
This image had the same effects applied to it as the previous - 44% noise added and a Gradient layer covering it in photoshop with opacity lowered to 70%. Let's see what happens.
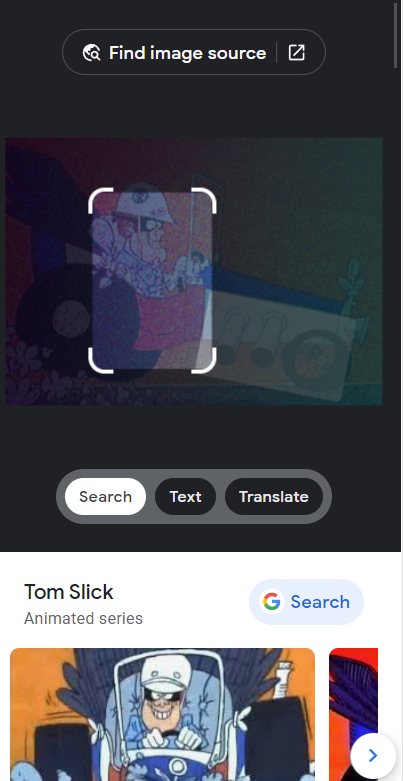
In the result below you can see that "reverse image search" figured out who's in the illustration. So next let's put the image into photoshop and fix that.
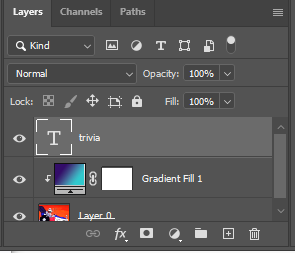
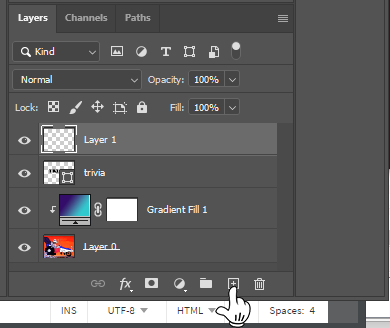
So below we've now opened the original psd image (below) in Photoshop and you'll see the layers panel much like the previous demo but now we're not going to add noise but still apply a gradient with 70%.

Now we click the text tool and type "TRIVIA". This will create another layer above the gradient layer.
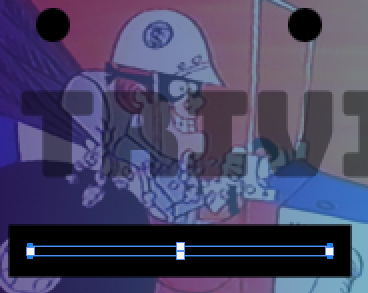
You can see the result on the image below.
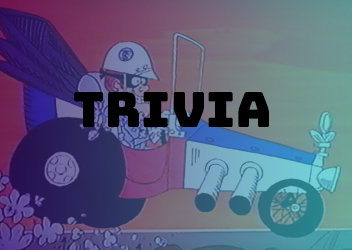
The text has opacity of 100% but now we lower it to 40% - shown below.
Make sure the text layer is selected(highlighted) when you do this.
Add a new layer
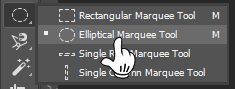
Click on the Elliptical Marquee tool.
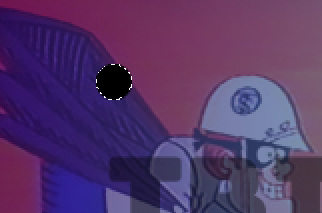
Holding down the shift key drag the Elliptical tool to make a small circle as shown below. Towards the bottom of your tool bar panel you should see 2 square boxes - defaulted to black as foreground(upper box) and white as background(lower). On your keyboard press Alt - Delete.(Mac would be option - Delete) this will fill the circle with black
Select the Move tool  at the top of your tool panel and holding down the Alt key select the dot and drag to the right to duplicate it.

Add another layer and selecting the line tool  and setting the stroke at the top
  draw a line as shown below.
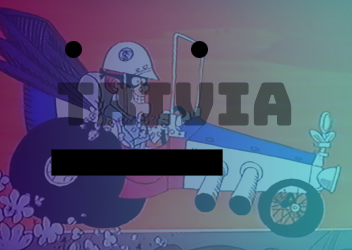
Here's the completed project.
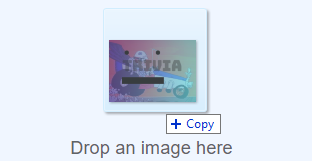
Use the instructions from the previous demo to export it as a png file and let's pop it back in Reverse Image search .
As before click on the camera.
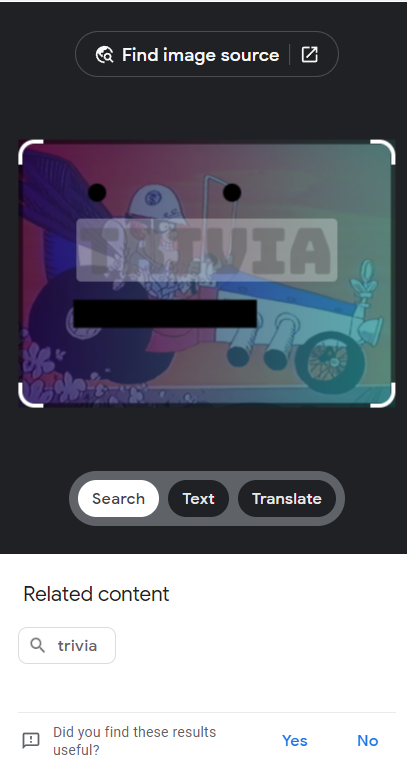
You drag and drop Tom Slick into the area.
And Voila! You'll notice that it highlighted "TRIVIA" and down below under "Related content" it has a search box with "trivia" in it. This is the only information it could extract from the image.
In summary, the 2 dots and the line take attention away from the lines on Tom Slick, his car etc.. These elements are bold and direct the algorithm to perhaps a face or at least lending presedence to something (though the algorithm doesn't know what) over Tom Slick who has become background noise. We found that removing just one of these elements (gradient, dots, line, trivia text with low opacity) would result in the algorithm figureing out who was in the image. An amazing tool for sure. As we said before there are many ways to stump "Reverse Image Search". This is only one.
Contact us
Try it out for free for a week. After that, a one time use for an event would be $15 or you can subscribe for $5/month and use it for an unlimited number of times. You can contact us at Webmesa.com